Blank Trailer Inspection PDF Template
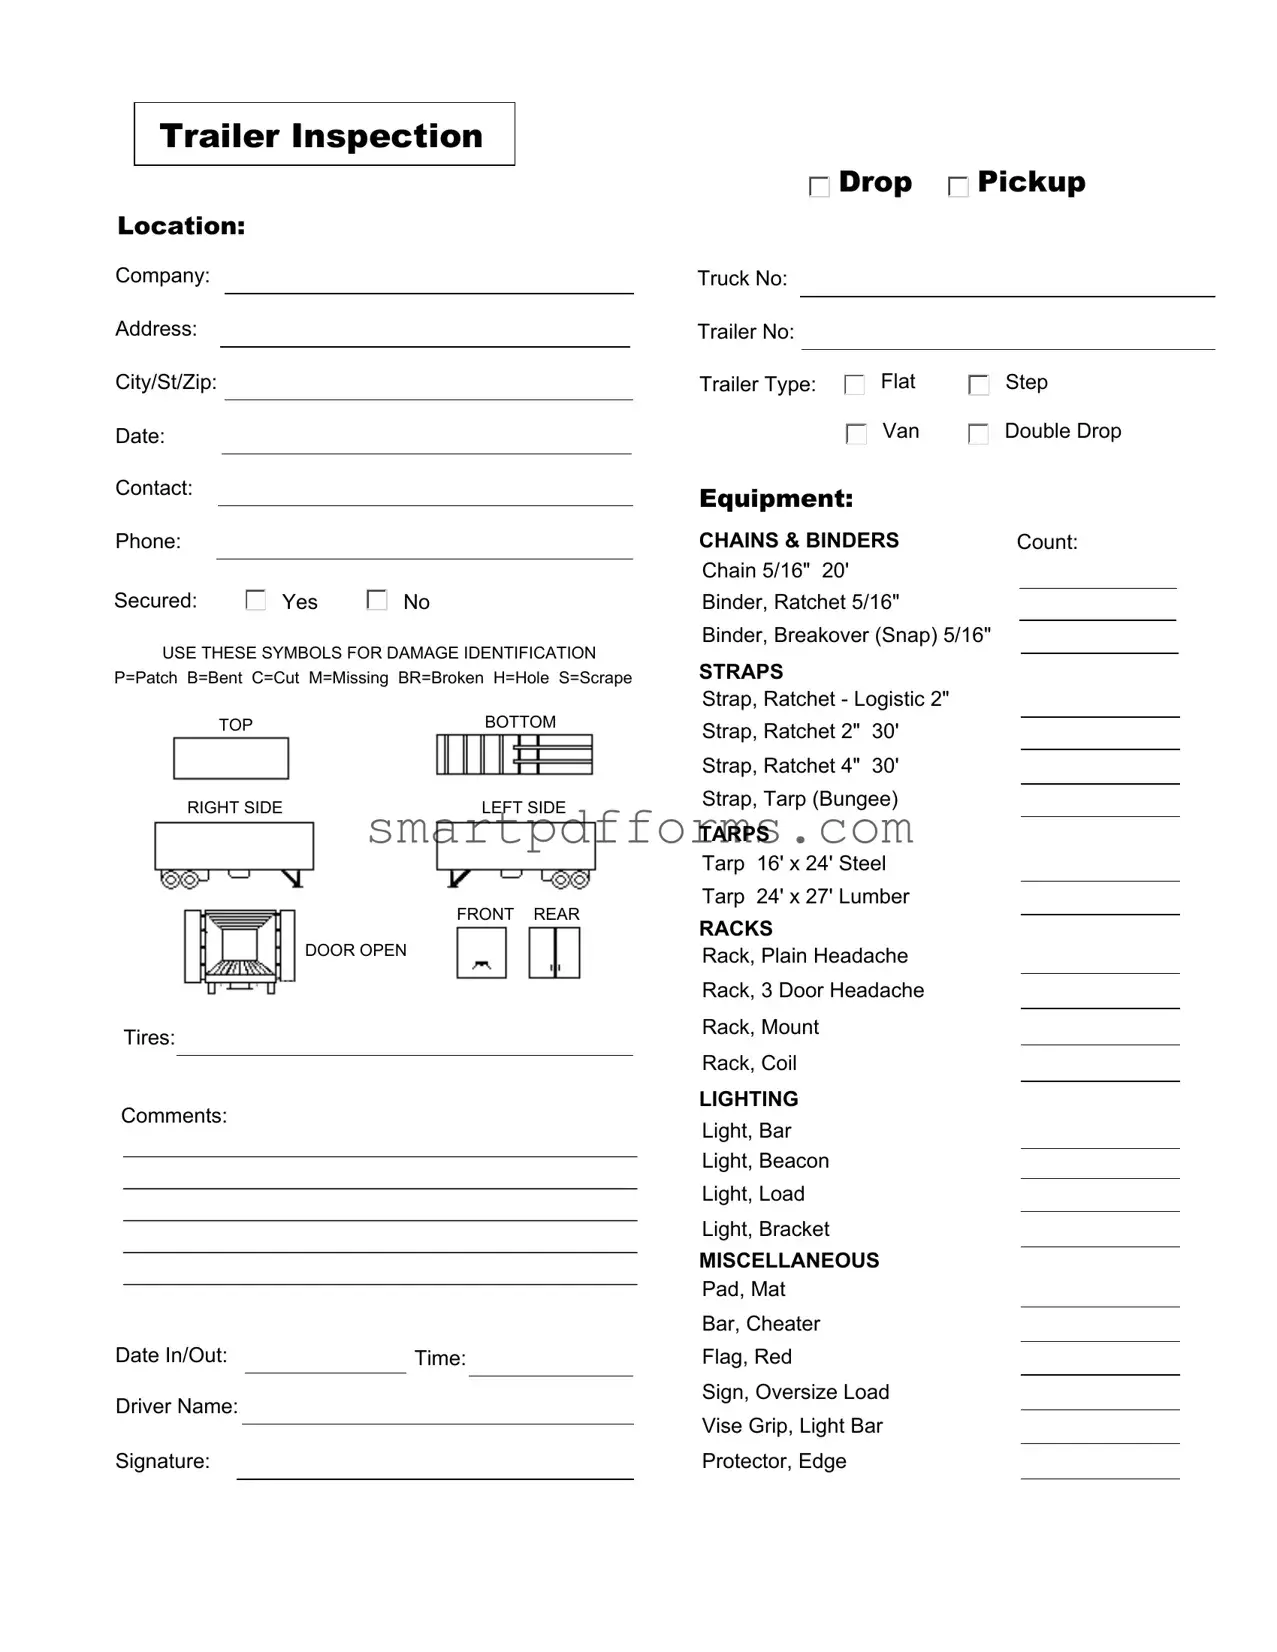
In the world of logistics and transportation, the Trailer Inspection form is an indispensable tool, ensuring the safety and readiness of trailers for the road. This comprehensive document captures crucial details about the trailer's condition, from the location of the inspection whether at a drop or pickup point, to the specifics about the trailer itself, including the company owning it, the type of trailer, and any equipment attached. The form meticulously details every aspect for examination, such as the security of the load, the state of the tires, and the presence of damage, using specific symbols for easy identification of issues like patches, bends, or cuts. It also serves as a record of the trailer's journey, noting the dates and times of inspection, and includes a system for assessing vital accessories like chains, binders, straps, and tarps, alongside safety and lighting equipment. With places for both the inspector and the driver to leave their signatures, the Trailer Inspection form is a critical step in ensuring the well-being of both the cargo and the people responsible for its transport.
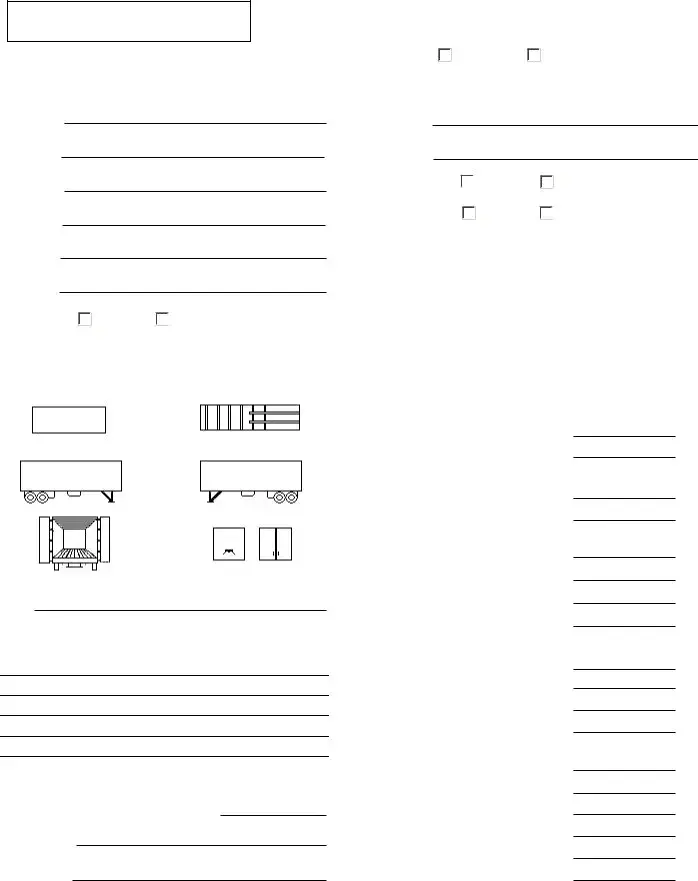
Preview - Trailer Inspection Form
Trailer Inspection
Location:
Drop |
Pickup |
Company:
Address:
City/St/Zip:
Date:
Contact:
Truck No:
Trailer No:
Trailer Type:
Equipment:
Flat
Van
Step
Double Drop
Phone:
Secured: |
Yes |
No |
USE THESE SYMBOLS FOR DAMAGE IDENTIFICATION P=Patch B=Bent C=Cut M=Missing BR=Broken H=Hole S=Scrape
TOPBOTTOM
RIGHT SIDE |
LEFT SIDE |
FRONT REAR
DOOR OPEN
Tires:
Comments:
Date In/Out: |
|
Time: |
|
|
|
Driver Name:
Signature:
CHAINS & BINDERS |
Count: |
|
||
Chain 5/16" 20' |
|
|
|
|
Binder, Ratchet 5/16" |
|
|
|
|
|
|
|
||
Binder, Breakover (Snap) 5/16" |
|
|
|
|
|
|
|
||
STRAPS |
|
|
|
|
|
|
|
|
|
Strap, Ratchet - Logistic 2" |
|
|
|
|
Strap, Ratchet 2" |
30' |
|
|
|
|
|
|
||
Strap, Ratchet 4" |
30' |
|
|
|
|
|
|
||
Strap, Tarp (Bungee)
TARPS
Tarp 16' x 24' Steel
Tarp 24' x 27' Lumber
RACKS
Rack, Plain Headache
Rack, 3 Door Headache
Rack, Mount
Rack, Coil
LIGHTING
Light, Bar
Light, Beacon
Light, Load
Light, Bracket
MISCELLANEOUS
Pad, Mat
Bar, Cheater
Flag, Red
Sign, Oversize Load
Vise Grip, Light Bar
Protector, Edge
Form Data
| Fact Name | Description |
|---|---|
| Form Usage | This form is used to document the condition of a trailer before and after transport for pickup or drop-off locations. |
| Inspection Criteria | Includes checks on equipment type, tires, chains, straps, tarps, racks, lighting, and miscellaneous items such as pads, bars, and flags. |
| Damage Identification Symbols | Symbols like P (Patch), B (Bent), C (Cut), M (Missing), BR (Broken), H (Hole), S (Scrape) are used to indicate specific types of damage. |
| Securing Cargo | The form includes a section to indicate whether the cargo has been secured with a simple "Yes" or "No" option. |
| Driver Information | Space is provided for the driver's name, signature, and the date and time of the inspection. |
| Governing Laws | While the form is a general template, specifics regarding the use and requirements can vary by state laws governing commercial transportation and trailer inspections. |
Instructions on Utilizing Trailer Inspection
Filling out a Trailer Inspection form is a crucial step in ensuring the roadworthiness and safety of a trailer before its operation begins. Whether you are conducting a drop or pickup operation, it's essential to document the trailer's condition accurately to avoid future liabilities and to maintain compliance with transportation regulations. Follow these steps methodically to complete the Trailer Inspection form correctly.
- Start by entering the location of the inspection in the space provided, specifying whether it's a drop or pickup location.
- Fill in the company name conducting the trailer inspection.
- Provide the complete address of the company, including city, state, and ZIP code.
- Record the date when the trailer inspection is conducted.
- Enter the contact information of the individual responsible for the trailer inspection, including a phone number.
- Specify the truck number and trailer number to identify the vehicle undergoing inspection.
- Select the trailer type from the options provided (Flat, Van, Step, Double Drop) and mark it accordingly.
- List all equipment on the trailer, ensuring to note the condition of each item.
- Indicate whether the load is secured adequately by marking "Yes" or "No."
- Use the symbols provided (e.g., P for Patch, B for Bent) to identify any damage in each specified area of the trailer, including top, bottom, right side, left side, front, rear, and door.
- Examine the tires for any issues and write any comments related to tire condition in the space provided.
- Note the date and time of inspection in and out fields.
- Write the driver's name who is responsible for the trailer during the inspection.
- The driver should then sign the form to authenticate the accuracy of the inspection report.
- Count and record the specifics of chains & binders, straps, tarps, racks, lighting, and miscellaneous items as listed, indicating quantities and types where applicable.
Once the Trailer Inspection form is filled out, it provides a comprehensive record of the trailer's condition before it enters operation. This documentation is essential for maintaining safety standards and ensuring compliance with transportation regulations. Always review the completed form for accuracy and completeness to ensure that all necessary information has been documented properly. This step is not just about regulation—it’s about safety on the roads for everyone.
Obtain Answers on Trailer Inspection
What is the purpose of the Trailer Inspection form?
The Trailer Inspection form serves as a comprehensive checklist designed to evaluate the condition and safety of a trailer before and after it is used. It guides the inspector through assessing various parts of the trailer, such as the tires, equipment, lighting, and securing devices. The form helps identify any damages or issues, using specific symbols for efficient communication, and ensures the trailer meets safety standards before hitting the road. This preventive measure is vital for avoiding accidents caused by equipment failure and for maintaining the trailer in optimal condition.
How should the symbols for damage identification be used?
On the Trailer Inspection form, specific symbols are provided to mark different types of damage. These symbols include P for Patch, B for Bent, C for Cut, M for Missing, BR for Broken, H for Hole, and S for Scrape. During the inspection, these symbols should be used to indicate the exact nature of any damage found on the trailer. This systematizes the documentation of damage, making it easier to understand the condition of the trailer at a glance and assists in planning any necessary repairs or maintenance work.
What items are checked under the “Secured” section, and what does it signify?
Under the “Secured” section, the inspector verifies whether specific equipment used to secure loads is present and in good working order. This includes an assessment of chains, binders, straps, tarps, and any other securing devices listed on the form. Marking “Yes” signifies that all items are properly secured and meets safety requirements, ensuring that the load is safely fastened and poses no risk during transport. Marking “No” indicates a potential safety hazard that must be addressed before the trailer is used.
What should be done if damage is identified during the inspection?
If damage is identified during the inspection, it should be thoroughly documented on the form using the provided symbols to specify the type of damage. The inspector should also include comments to offer more details on the extent and location of the damage. After documenting, it's crucial to notify the responsible party about the findings so that appropriate repairs can be made. The trailer should not be used until it has been deemed safe, ensuring that all damages have been properly addressed and fixed.
Common mistakes
Common mistakes made during the completion of the Trailer Inspection form can impact the accuracy and effectiveness of the inspection process. Recognizing and avoiding these errors is crucial for ensuring the safety and compliance of the trailer.
- Not verifying the location (Drop/Pickup) accurately, leading to confusion regarding the inspection site.
- Incorrectly noting the Trailer Type (e.g., Flat Van, Step Deck, Double Drop), which is essential for the specific inspection criteria applicable to the trailer type.
- Failing to list the Contact information completely, including the phone number, which is crucial for clarification or follow-up questions.
- Overlooking the Date In/Out and Time, which tracks the inspection's timing and duration, critical for operational and billing purposes.
- Forgetting to check or incorrectly marking the Secured box (Yes or No), which is essential for understanding the load securing status.
- Misidentifying damage by using incorrect symbols (e.g., P=Patch, B=Bent, C=Cut), which can lead to improper or inadequate repair actions.
- Omitting the Driver Name and Signature, an essential step for accountability and confirmation that the inspection was completed.
- Skimming over or inaccurately counting the CHAINS & BINDERS and STRAPS section, risking the safety of the load during transport.
It's also common for individuals to skip sections they mistakenly consider non-applicable, such as LIGHTING and MISCELLANEOUS items, which include crucial safety equipment like lights, flags, and signs. Ensuring every section is completed thoroughly is vital for a comprehensive inspection.
- The equipment list, including TARPS, RACKS, and MISCELLANEOUS items, should be checked against the trailer's current equipment to confirm presence and condition.
- Damage identification symbols must be used accurately and consistently throughout the form for precise communication of issues.
- Make sure the inspection includes checking all specified areas of the trailer, including TOP/BOTTOM, RIGHT SIDE, LEFT SIDE, FRONT, REAR, and DOOR sections.
- Comments should be detailed and clarify any issues found during the inspection, providing valuable information for maintenance and repair teams.
Documents used along the form
Completing a Trailer Inspection form is an essential step in ensuring the safety and compliance of trailer equipment before its use. However, this form is often just one component of a comprehensive array of documents necessary for transportation and logistics operations. Other key forms and documents that are frequently used alongside the Trailer Inspection form provide a broad overview of operational, safety, and regulatory compliance aspects vital for the smooth execution of transportation services.
- Vehicle Maintenance Log: This document keeps a record of all maintenance activities performed on a vehicle, including trailers. It is crucial for tracking the history of repairs, preventive maintenance, and inspections, ensuring that the vehicle is in optimal condition and complies with safety standards.
- Driver’s Daily Log Book: Used by drivers to record their duty status for each 24-hour period, this document complies with the Hours of Service regulations. It ensures that drivers are adhering to legal driving times, taking requisite rest periods, and provides a record of their work hours.
- Bill of Lading (BOL): This is a legal document between the shipper and carrier detailing the type, quantity, and destination of the goods being carried. It serves as a receipt of freight services, a contract between the shipper and the carrier, and a document of title that can be used to claim ownership of the cargo.
- Cargo Damage Report: If goods are damaged during transportation, this report outlines the type and extent of damage, potentially including photographs, and is used for claims processing and to improve future handling practices.
- Accident Report Form: In the event of an accident involving the trailer, this form is used to document the incident, including details of the parties involved, the circumstances of the accident, and any damages or injuries that occurred. It is vital for insurance claims and legal matters.
- Fuel Tax Reports: These reports are necessary for compliance with state and federal fuel tax regulations. Carriers must record the amount of fuel purchased and used in the operations, which is essential for calculating tax liabilities.
- Pre-Trip Inspection Checklist: Apart from the Trailer Inspection form, a comprehensive pre-trip inspection checklist for the entire vehicle ensures that all components, including the engine, lights, brakes, and safety equipment, are in good working order before departure.
Each of these documents plays a critical role in transportation logistics, ensuring safety, regulatory compliance, and operational efficiency. By integrating these forms with the Trailer Inspection form, stakeholders can maintain high standards of service delivery and vehicle upkeep, contributing to the overall success of transportation operations.
Similar forms
Vehicle Inspection Form: Similar to the Trailer Inspection form, the Vehicle Inspection Form is utilized to ensure that a vehicle meets safety and operational standards. It focuses on inspecting different parts of a vehicle, such as the engine, brakes, and lights, similar to how trailer inspections assess various components like tires, lighting, and equipment.
Pre-Trip Inspection Checklist: This document is used by drivers before starting a trip to verify that the vehicle and trailer are safe to operate. It covers several of the same areas as the Trailer Inspection form, including checking for damage and ensuring that all equipment is secured and functional.
Equipment Maintenance Log: An Equipment Maintenance Log tracks the servicing and repairs of equipment over time. It is similar to the Trailer Inspection form as both are used to monitor the condition of equipment (in this case, trailers and their components) to ensure they are in optimal working condition.
Damage Report Form: The Damage Report Form is used to document any damage to property or equipment. It is akin to the Trailer Inspection form's section on damage identification, specifying what kind of damage has occurred (such as patches, bends, or cuts) and its location on the trailer.
Cargo Load Plan: This form helps in the planning and documenting of how cargo is loaded onto a vehicle or trailer. While it focuses more on the arrangement and security of the cargo, it relates to the Trailer Inspection form's sections on securing equipment and checks for ensuring that the load is safely accommodated.
DOT Inspection Form: Required by the Department of Transportation, this form is similar to the Trailer Inspection form as it is another mandatory checklist ensuring that commercial vehicles comply with safety standards. Both forms include inspections of tires, lights, and overall trailer integrity.
Dos and Don'ts
When completing a Trailer Inspection form, attention to detail and accuracy are paramount. Below are guidelines that should be followed to ensure the process is carried out effectively and efficiently:
Do:Read the entire form before filling it out, to understand all the required information and instructions.
Use the designated symbols (e.g., P=Patch, B=Bent, C=Cut) accurately to report any damage or issues, ensuring clarity and consistency in communication.
Verify all details entered, such as the Trailer Number, Truck Number, and Equipment type, to ensure they match the actual items being inspected.
Inspect each part of the trailer as outlined in the form (Top, Bottom, Right Side, Left Side, Front, Rear, and Door) thoroughly to avoid missing any damage or issues.
Sign and date the form after completing the inspection to authenticate the document.
Rush through the inspection process. Taking the proper time to conduct a thorough inspection can help avoid potential safety issues and inaccuracies on the form.
Overlook any section of the form, even if it may seem unimportant. Each section is designed to capture essential details for the trailer's safety and operation.
Forget to check the Secured status. Whether it's "Yes" or "No," this information is crucial for understanding the trailer's condition and readiness for transit.
Leave any fields blank unless they are not applicable. If a section does not apply, consider marking it as "N/A" instead of leaving it empty to indicate that it was reviewed but not applicable.
Omit capturing clear and complete comments on any observed damage or issues. Detailed comments can provide valuable context for maintenance teams or other involved parties.
Following these guidelines helps ensure that the Trailer Inspection form is filled out comprehensively and accurately, which plays a vital role in maintaining road safety and adhering to compliance regulations.
Misconceptions
Understanding the Trailer Inspection form is crucial for anyone in the transportation and logistics field. However, there are several common misconceptions about this document that need to be cleared up. Let’s dive into some of these misconceptions to ensure clear and accurate comprehension.
- Misconception 1: The Trailer Inspection form is only for identifying current damage.
Many people think the form is strictly used to note existing damages on a trailer. While marking damages like scratches or dents is a key part of the inspection, the form serves a broader purpose. It is also essential for ensuring the roadworthiness of the trailer, checking the state of tires, lights, and ensuring all equipment is properly secured. This thorough inspection helps prevent accidents and ensures safety on the road.
- Misconception 2: If a trailer passes the inspection once, it's good indefinitely.
This belief can lead to overlooking potential issues that arise after the initial inspection. Trailers undergo a lot of wear and tear during operations. Thus, each time a trailer is picked up or dropped off, it needs to be inspected. Routine inspections guarantee that components like chains, binders, and straps meet safety standards consistently and are in good condition.
- Misconception 3: The form is too complex and requires extensive training to understand.
While the Trailer Inspection form contains various symbols and sections, it is designed to be straightforward once you understand what each part represents. Staff members can quickly learn how to use it effectively with minimal training. There are clear indications for types of damage and equipment checks, making it user-friendly for drivers and logistics personnel alike.
- Misconception 4: The Inspection form doesn't need to be filled out completely.
Some might think it's okay to leave sections blank if they don't see any visible issues, but completing the form in its entirety is crucial. Each section captures essential safety and compliance information. Skipping parts can result in missing critical details about the trailer’s condition, leading to potential safety hazards or compliance issues. It's always better to be thorough and ensure nothing is overlooked.
Clearing up these misconceptions about the Trailer Inspection form is vital for the safety and efficiency of trucking operations. Proper and complete inspections support safe roadways for everyone and ensure that the equipment is maintained in its best condition.
Key takeaways
Filling out a Trailer Inspection form is a critical step for ensuring the safety and legality of hauling activities. To make the most of this process, here are some key takeaways:
- Always double-check the location section of the form to confirm whether the inspection is for a pickup or a drop. It governs the context in which the inspection is being performed.
- Accurate company information, including the address, contact information, and truck and trailer numbers, is vital for record-keeping and accountability.
- Identifying the trailer type and its equipment specifics helps in understanding the nature of the inspection and any special attention or equipment that might be needed.
- When using the designated symbols for damage identification (e.g., P=Patch, B=Bent, etc.), be thorough and precise to ensure that any issues can be easily understood and addressed by others who read the form.
- Inspecting from all angles—top, bottom, right side, left side, front, and rear—is essential for a comprehensive evaluation. Each section should be carefully reviewed for any potential hazards or damage.
- Verifying the security of the load (indicated by a simple Yes or No) is a crucial safety measure that should not be overlooked.
- Detailed inspection of tires and the use of the comments section for additional notes provide a more in-depth review of the trailer's condition, which is critical for safety on the road.
- Recording the date and time of the inspection, along with the driver’s name and signature, offers a clear trail of accountability and ensures that inspections are performed regularly.
- Inspecting and counting additional equipment like chains, binders, straps, tarps, racks, and lighting ensures that all components needed for safe and legal transport are present and in good condition.
By paying close attention to these aspects, inspectors can ensure a thorough and effective trailer inspection process, paving the way for safer journeys and compliance with transportation regulations.
Popular PDF Forms
Rental Reference Form - Assists tenants in substantiating their residency and utility expenses through a formal landlord verification process.
Are Medicaid and Medical the Same - Asks for educational history, including the highest grade completed and any special education.